
Stash-Busting Sock Yarn: A Colourful, Cosy Scarf with Zero Stress
Got a stash of leftover sock yarn you can’t bear to throw away? This colourful, cosy scarf is the perfect stash-busting project — no pressure, no colour stress, and no ends to weave in. By combining simple stripes with a touch of controlled randomness, you can turn odds and ends of yarn into a scarf that looks beautifully planned rather than thrown together. If you love colour but hate overthinking, this project might be exactly what your stash has been waiting for.
FREE PATTERNS
Carol Ibbetson
1/5/20265 min read
Why I Had So Much Sock Yarn (Despite Rarely Knitting Socks)
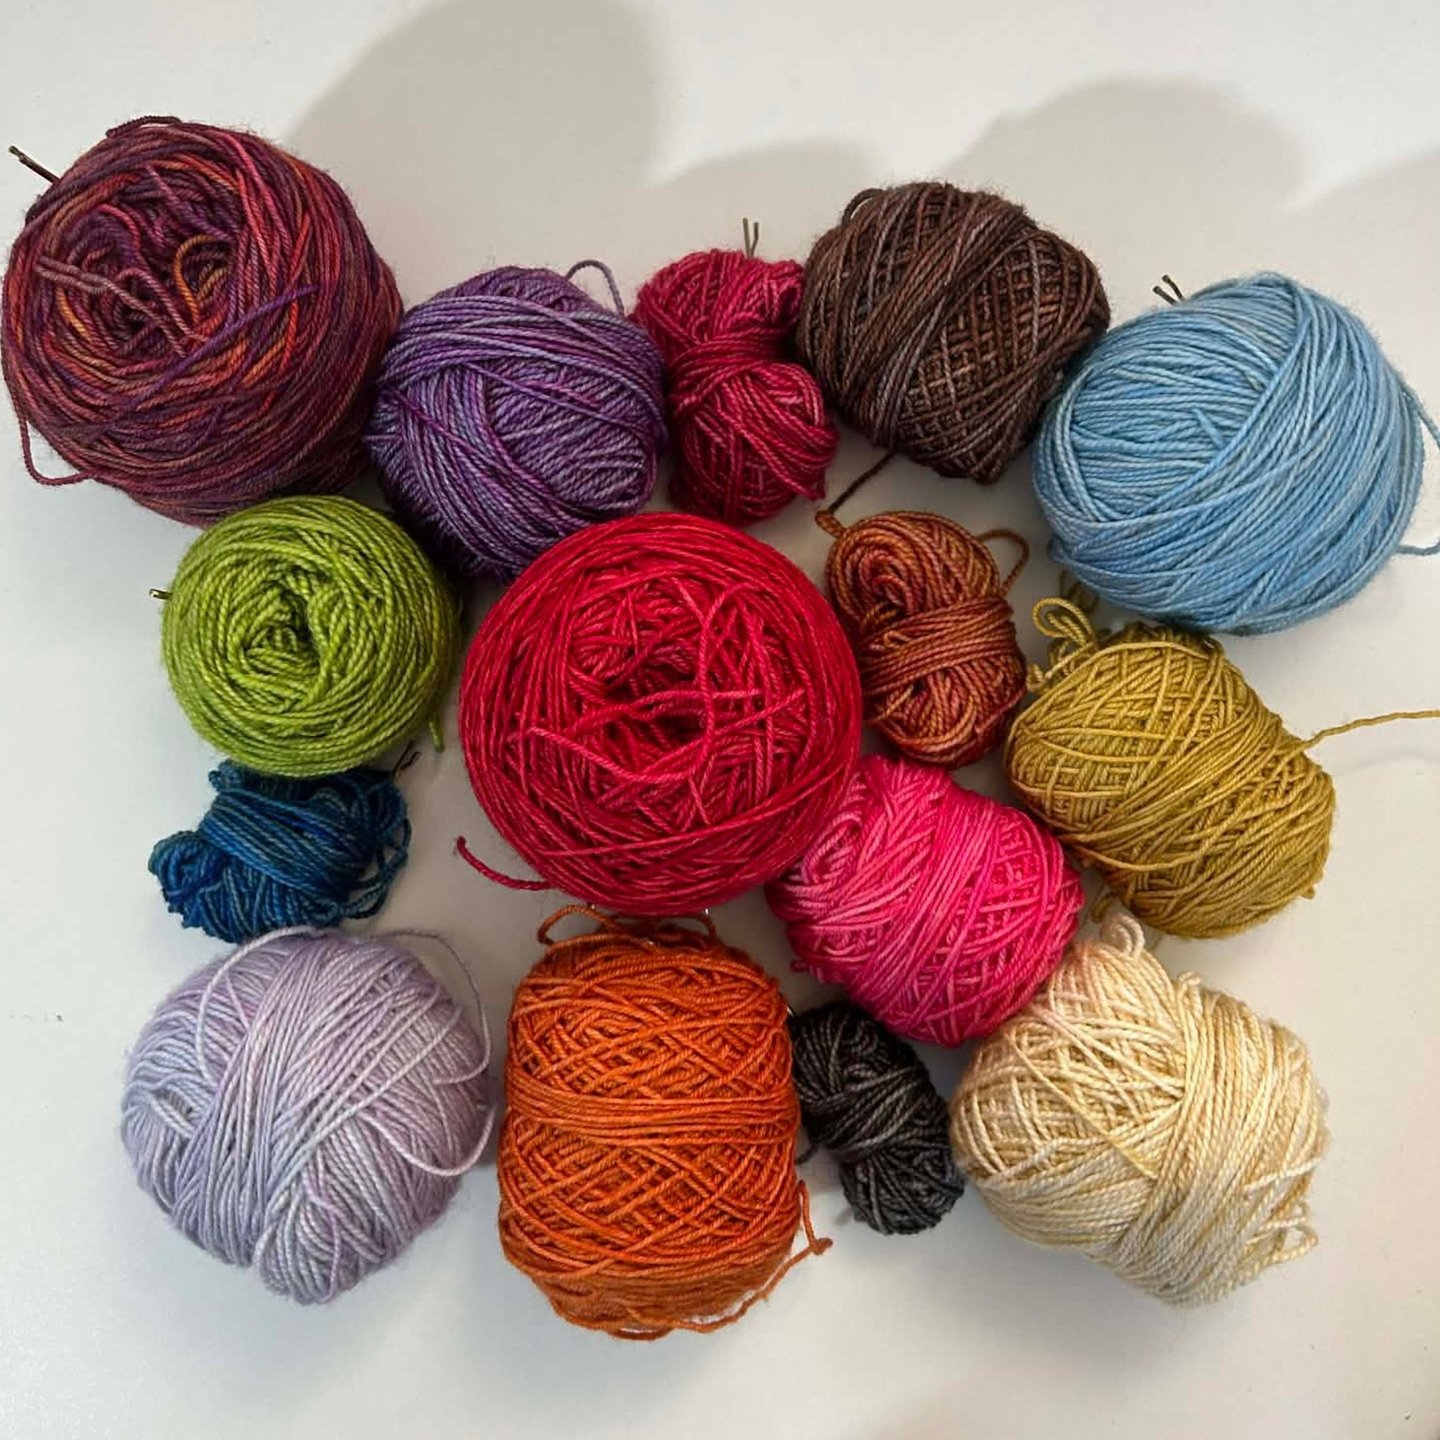
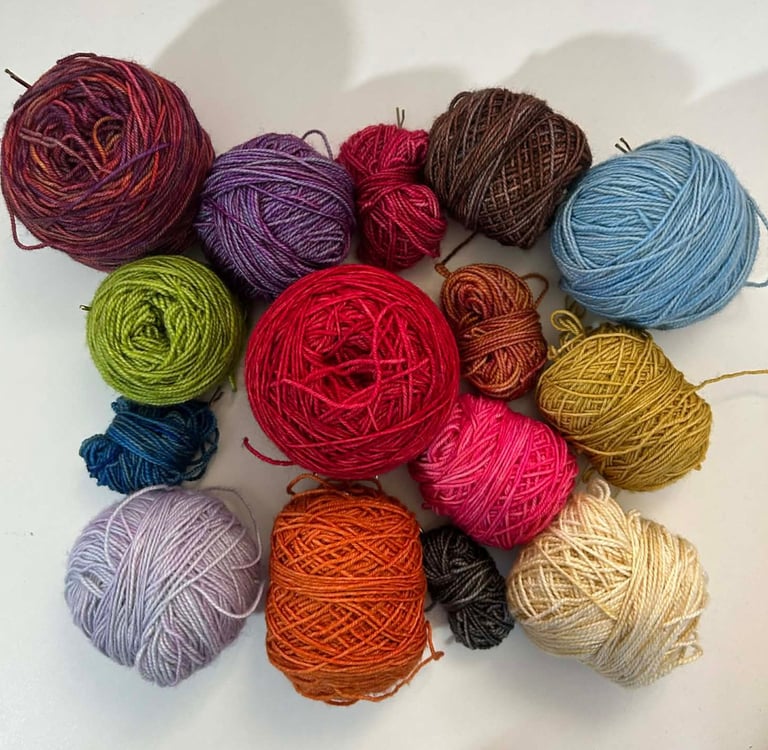
I have an inordinate amount of gorgeous sock yarn leftovers in my stash.
Which is slightly odd, because I don’t actually knit that many socks.
What I do love using sock yarn for, though, is shawls and scarves. Sock yarn is perfect for accessories — light but warm, colourful without being bulky, and a joy to work with. And yet… these leftovers have been sitting there for years, because I simply couldn’t bring myself to throw them away.
Surely there had to be something wonderful I could do with them!
Could I make a Sweater?
For a long time, I toyed with the idea of turning these leftovers into a sweater. I looked through pattern after pattern and gathered plenty of inspiration, but something always stopped me:
👉Would I actually have enough yarn?
👉Would the colours be just a bit too much?
👉Would it end up looking like a dog’s dinner?
In the end, I realised I was tying myself in knots over decisions that didn’t need to be made.
Why a Scarf Is the Perfect Stash-Busting Project
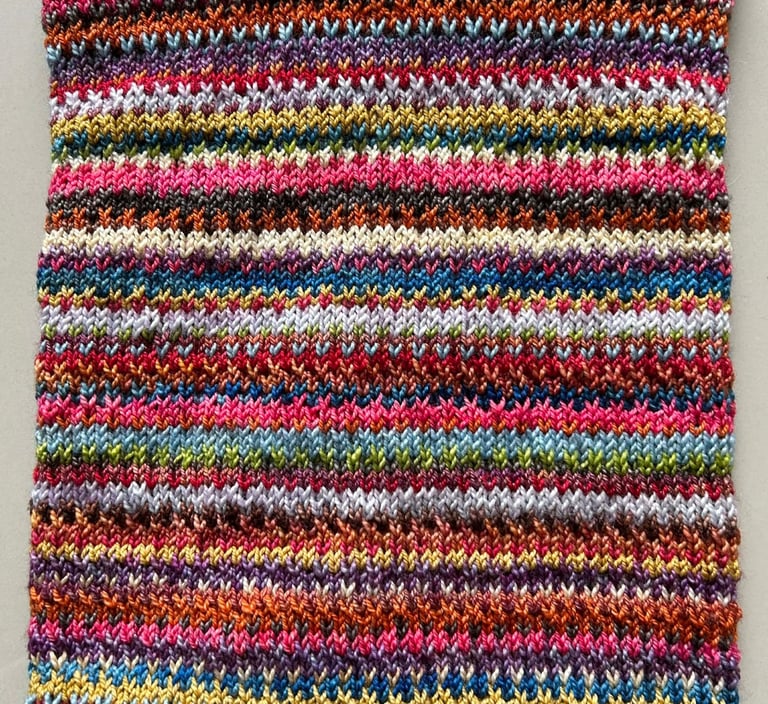
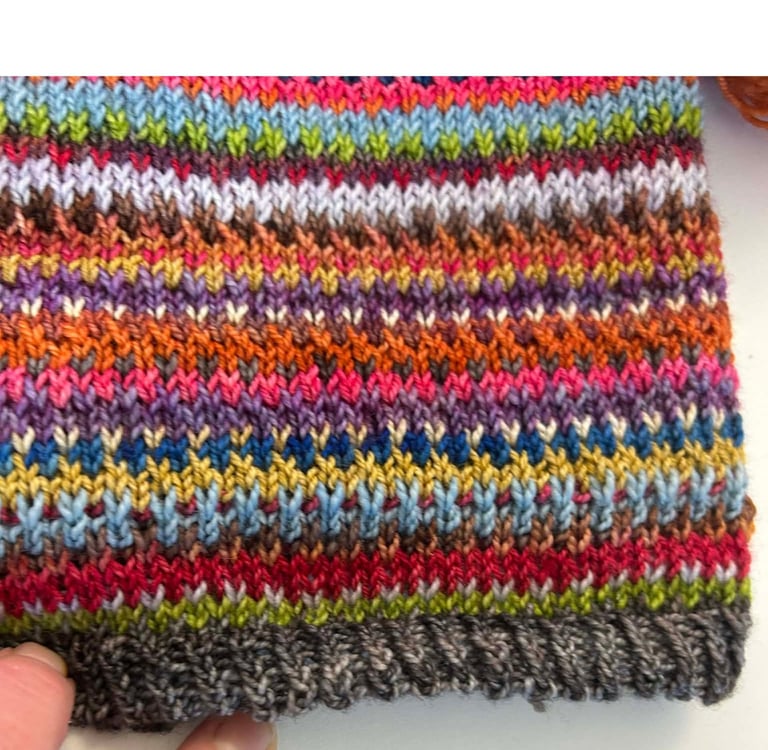
I decided to make a colourful scarf, worked in the round.
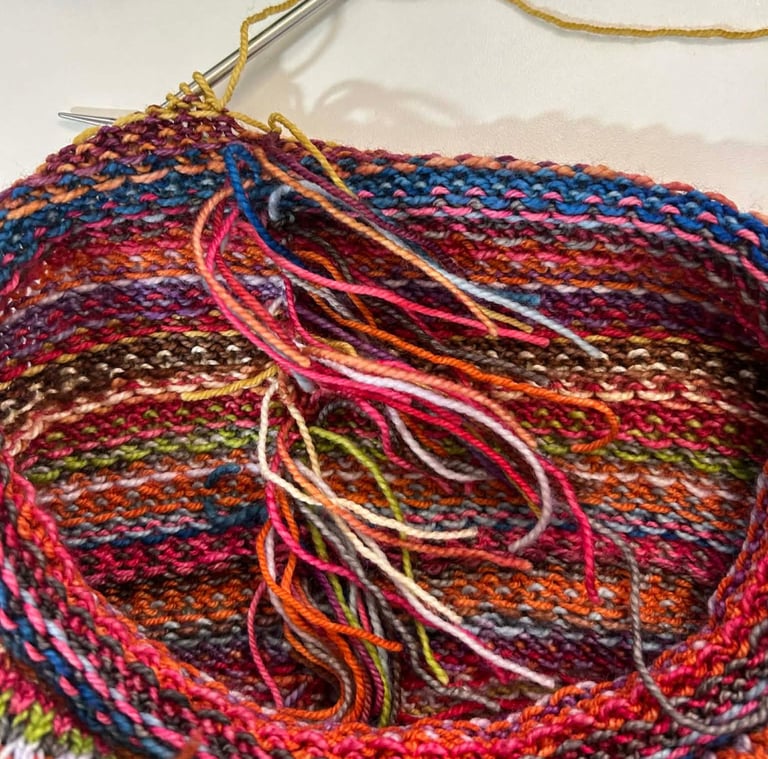
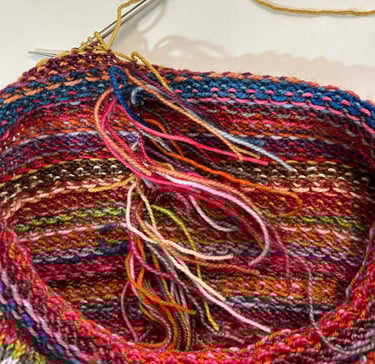
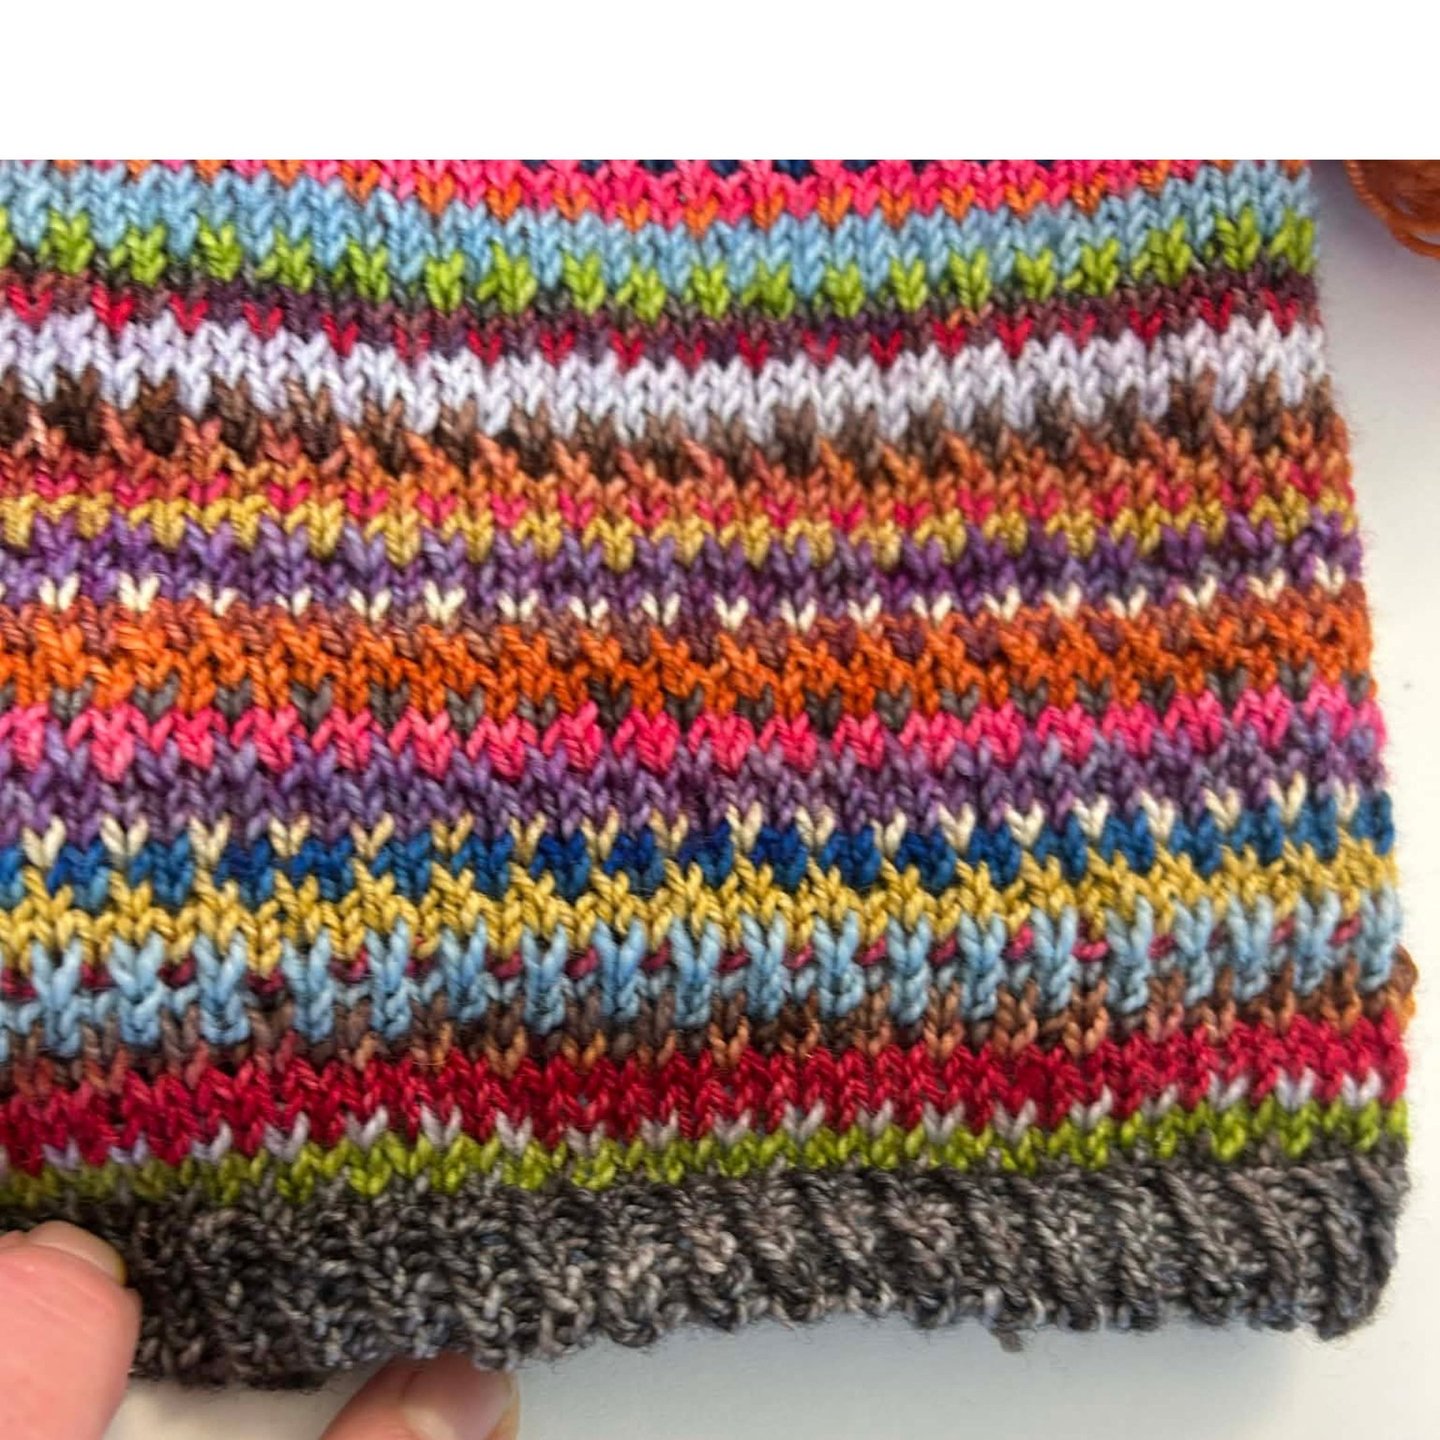
That one decision solved several problems at once: A scarf doesn’t need sweater quantities of yarn - colour play feels joyful rather than risky - and best of all… no ends to weave in — they can live happily on the inside and can even be knotted together as you can see below! 😱😱😱
And honestly, who doesn’t love a colourful, cosy scarf?
Finding a Colour Strategy Without the Stress
Even then, it still took a while to settle on how to use all those colours.
I considered a stranded (Fair Isle–style) pattern, but struggled to choose main and contrast colours. I thought about simple stripes, but wanted something a little more interesting.
What I really wanted was something that felt playful and freeing, without descending into chaos.
Using Random Stripes for a Planned-Looking Result
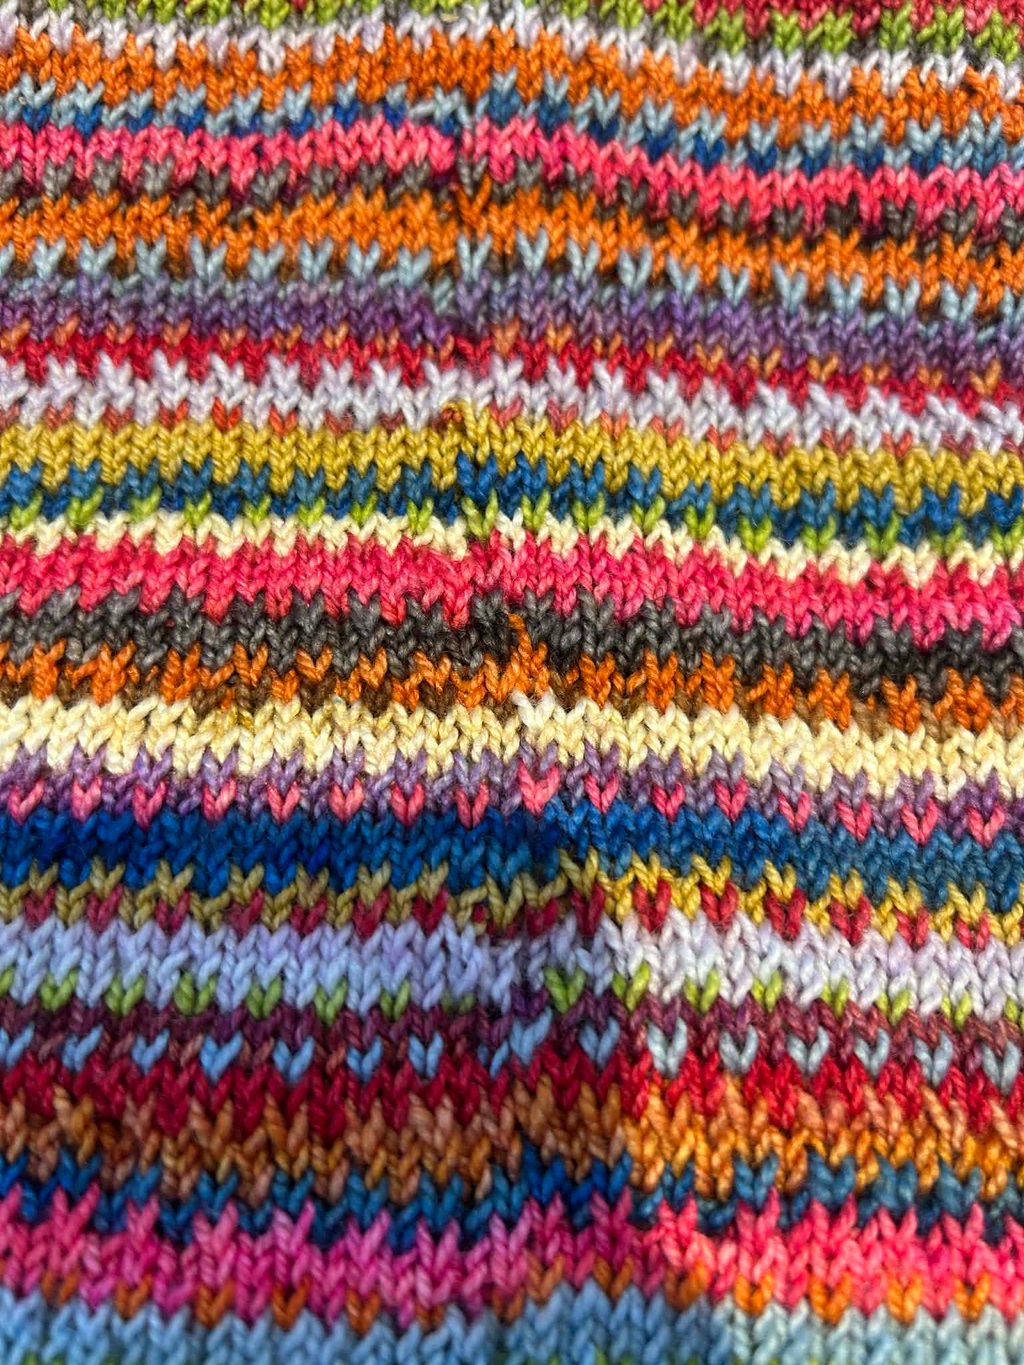
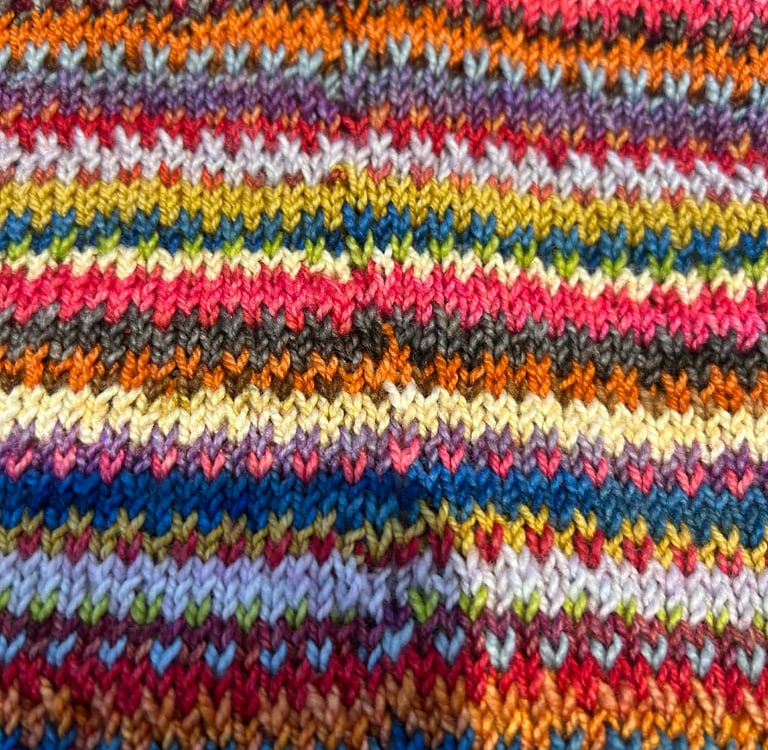
The basic idea was this: Choose from a fixed set of colours - change colours frequently - remove decision-making from the process.
Each stripe would be worked for 1, 2, or 3 rounds, with both the colour choice and stripe height chosen randomly.
The Simple Rules That Make Random Colourwork Work
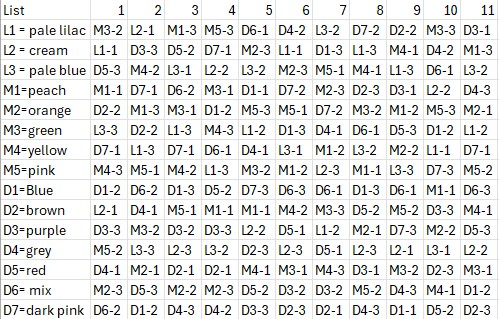
👉In my case I chose 15 colours only – all solid or near-solid shades, avoiding speckles or heavy variegation.
👉Consistent colour-change detail – the first round of each new colour begins by slipping one stitch from the previous colour, then knitting the next stitch and repeating this to the end of the round.
👉No concerns about the jog! – I decided early on I did not want to be concerned to try and get a 'jogless jog' on each colour change. I found that the slip stitches helped disguise the join enough not to worry about it (see below - not too much of an issue in my opinion).
👉Even colour usage – each set of 15 stripes uses all 15 colours once, in a random order.
👉Truly random stripe heights – 1, 2, or 3 rounds, no tweaking (Only kidding, I sometimes swapped some colours around if they were very similar).
👉Light, medium, and dark balance – this is not strictly necessary but I checked how light or dark my yarns were (by turning the image into a monochrome image) and as it turned out, I had:
- 3 light shades; pale lilac, cream and pale blue
- 5 medium shades; peach, orange, green, yellow and pink
- 7 dark shades; blue, brown, purple, gry, red, brown/orange mix and dark pink.
Letting Technology Do the Decision-Making
Using ChatGPT, I generated 11 sets of 15 stripes, randomly assigning both colour order and stripe height. Once that was done, all I had to do was knit.
Below you can see how this works. I started with List 1, the first stripe is in M3 - peach and is 2 rounds tall, second stripe is in L1 - pale lilac and is 1 stripe tall, third stripe is in D5 - red and is 3 stripes tall.
Remember that the first stripe in a new colour is always worked as (knit one stitch, slip one stitch) all around (or vice versa) to help the colours blend together.
When I finished with List 1, I moved onto List 2 and so on. I can repeat any list any time I want.
The WIP Scarf: Why This Approach Works So Well
The scarf looks planned rather than random, since each colour is used once in every 15 stripes - just in a random order. It looks lively but not overwhelming, cohesive, and I'm sure it will be a joy to wear.
Sometimes the best creative decision you can make is to stop deciding altogether.

Want to Make Your Own Stash-Busting Scarf?
👉First of all decide on which colours you want to use. If you use 15 you can use my stripe charts above. If you have less just remove some colours from the list. If you have more just ask ChatGPT to do the same for you as it did for me!
👉I used a 3.5mm (US 4) circular needle which is perfect for sock yarn. If you are using a different thickness of yarn then adjust accordingly.
👉My circular needle was just 32cm (12in) long so that I wouldn't need to use the magic loop method of working in the round - my stitches fitted perfectly and I could just keep knitting.
👉I cast on 120 stitches using a fairly loose cast-on method. Again if you are using a different thickness of yarn, you may need to adjust the number of stitches. The width of my scarf is 22cm (8.5in) flat. Tension is not important but mine is: 27 stitches and 34 rounds to 10cm (4in).
👉Decide if you want a border top and bottom. Just choose one colour and work either a 1 x 1 rib as I did for about 6 rounds or just knit 6 rounds in that colour and let the end roll over - both lovely effects.
👉After the border continue working from the chart, knotting together the beginning of each new colour with the end of the last colour, inside the work.
👉Remember to work (knit one stitch, slip one stitch) all around the first round in each colour - even if it is just a one round stripe. Or swap and work (slip one stitch, knit one stitch) all around, on the first round. Do not pull the yarn too tight across the back of the slipped stitches to avoid puckering.
👉Keep going until you are happy with the length, work the top border in the same colour as the bottom border and weave in the beginning and ending yarn tails. Make sure all the knots inside are secure and trim the ends.
That's it!
I hope you enjoy this exploration into 'controlled randomness'. I would love to see your results, so please tag me on any posts of your creations!
If you would like to know when I release new free patterns on the blog
SUBSCRIBE BELOW
⬇️⬇️⬇️